⚔ TerraFeud
Full Rules v2.0 ← Classic rules
TERRAFEUD
Feudal Lands · Full Rules
Version 2.0 — All Mechanics
Players: 2
Age: 12+
Duration: 20–35 min
Condition: 3 options at once

This document describes the same game as the Classic rules in more depth — it has more explanations and examples, not a separate, more complex mode. Only one ruleset is implemented — there are no "advanced" variants (the Summer/Winter season is not a separate rules variant, but a toggle on the start screen — see River and Crossings)

About the Game

TerraFeud is a strategy game for two players on a hexagonal board (91 hexes, side 6), close in spirit to chess but with its own system of pieces and mechanics. Two feudal houses fight for victory through one of three simultaneously active conditions: destroying the enemy feudal, checkmating him, or capturing the enemy castle. The board is divided by a river with bridges and fords.

Components

Pieces — Full List

PieceCountRole
⚜ Feudal×1Key piece — loss upon death
⚔ Heavy Knight×1Most mobile combat piece
⚡ Pikeman×2Zone control
🐴 Light Cavalry×2Fast leaping attack
🏹 Archer×2Ranged combat — threat marker
🛡 Infantryman×6Backbone — coordinated attack

Markers and Tokens

  • Archer markers — 4 colors (2 per player). Each archer has its own color
  • Feudal castling token — ×1 per player

Game Parameters

In the computer version, a game has almost fixed parameters — from the main screen you can only toggle the hill and swamp on/off and choose the season (Summer/Winter); nothing else needs to be agreed upon in advance:

1. Victory Condition — All 3 at Once

Feudal Destroyed
A regular attack, a coordinated infantry attack, an archer marker, or a "bridge kill" by a knight
Feudal Checkmated
The feudal is under threat and has no safe hex (including castling) — the game ends without direct destruction
Castle Captured
Any of your own pieces reaches the central hex of the enemy castle (f1 or f11)

2. Setup

Classic mirrored setup — fixed, both players see the positions of all pieces from the start.

River and Seasons
The season (Summer/Winter) is chosen once on the start screen and is fixed for the whole game. Summer (default) — the river is impassable without a crossing. Winter — the river freezes and becomes passable for all pieces, like ordinary land — see River and Crossings

Combat Phase

  • Players take turns alternately, White starts
  • One action per turn: move OR attack OR a deferred archer action (a shot) OR castling OR the feudal's Order
  • Moving onto a hex with an enemy piece = attack
  • After a move — turn passes to the opponent

Pieces — Full Description
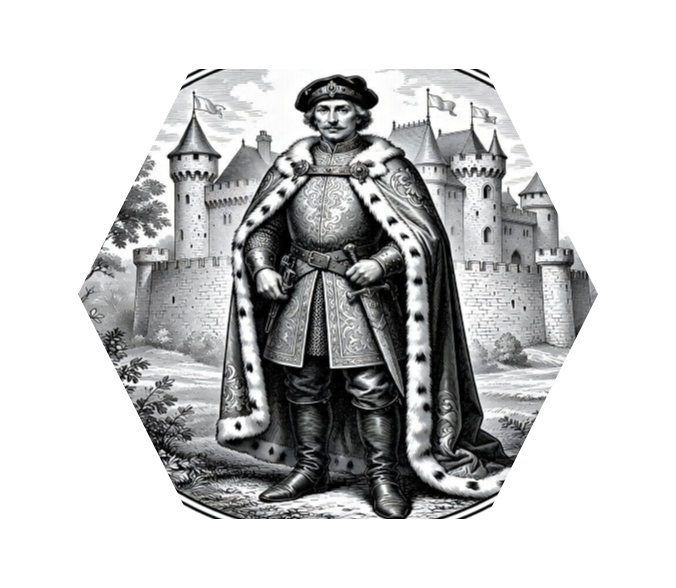
Feudal (Commander)
An active command piece — has its own aura and Order, not merely a target
×1
Move
1 hex in any of 6 directions. The river without a crossing is impassable
Attack
Strikes any adjacent enemy piece — no rank restrictions. Exception: feudals do not strike each other
Kings' Rule
A feudal cannot end up adjacent to the enemy feudal — and vice versa
Aura — Infantry Bonus
2-hex radius around the feudal. An infantryman inside the zone → 2 hexes in a straight line. The bonus applies starting from the turn after entering. Leaving the zone — the bonus disappears immediately
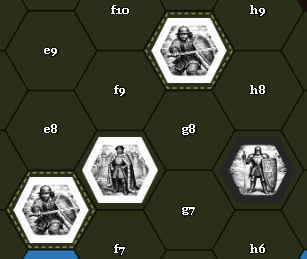
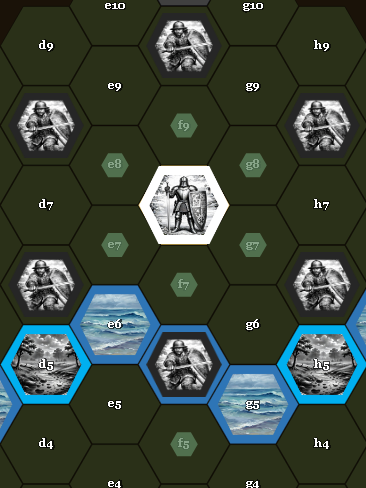
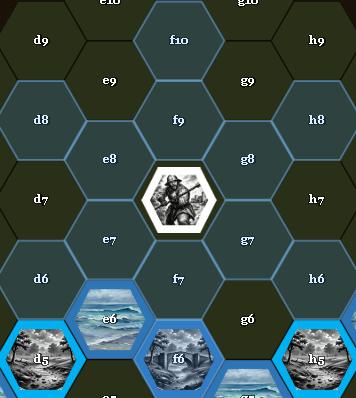
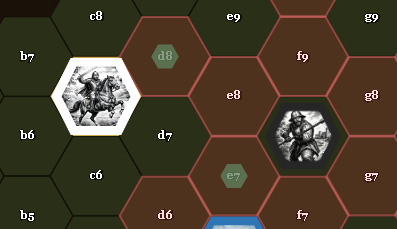
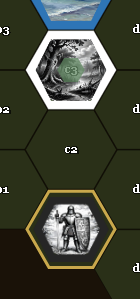
The feudal's aura highlights only its own infantry within radius 2 — other pieces are not highlighted
The dashed gold ring — only on your own infantry. An enemy knight in the same radius is not highlighted
Castling
Once per game. The feudal swaps places with an adjacent infantryman — both pieces stay on the board alive. Does not require being under threat — available at any moment until used. The piece that ends up in the feudal's spot takes on all the ensuing risk
Order
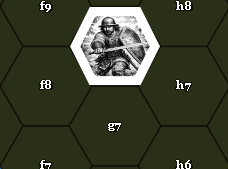
Instead of a normal move. If there are 2+ of your own infantry within the aura zone (radius 2) — the feudal orders exactly TWO of them to move 1 hex each. Each ordered infantryman then attacks any enemy piece alone this turn — the Order overrides the infantryman's usual restriction. Unlimited uses per game. Details
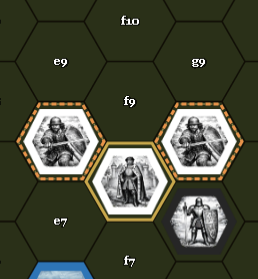
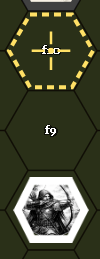
1. Choose candidates Clicking the feudal and the Order button highlights two candidate infantrymen with an orange dashed outline
Click the feudal → "Order" — both infantry in the zone are highlighted
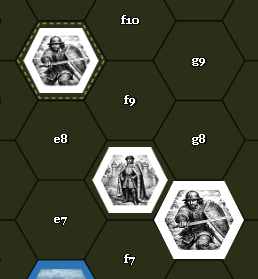
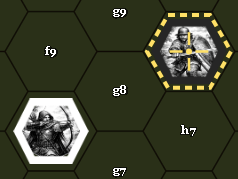
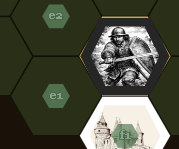
2. Result of the Order After the Order, one infantryman simply moved to a new hex, the other attacked and captured the enemy knight
One infantryman simply moved, the other attacked and captured the knight — alone
Promotion
An infantryman cannot be promoted to a feudal
Special
Death of the feudal = defeat. "Checkmate" — under threat with no safe hex (including castling) — is also defeat, without direct destruction
↑ Back to Pieces
Heavy Knight
The most expensive combat piece — moves like a rook, with no special protection whatsoever
×1
Move
Any number of hexes in a straight line along 1 of 6 axes. Stops before its own piece; strikes an enemy piece and takes its hex
The knight's legal moves are highlighted along all 6 straight lines, up to the nearest piece
Move lines in all 6 directions at once, until blocked by a piece — like a rook in chess
River
Summer: only via a bridge. Always stops on the first hex right after the bridge (if an enemy is standing exactly on the bridge — it is killed "en passant" and the knight still stops right after the bridge, if that hex is free). A ford is a total blockade — crossing it is impossible at all. Winter: both the ordinary river and fords are passable, like ordinary land — only stopping right after the bridge remains mandatory in both seasons (a property of the structure itself)
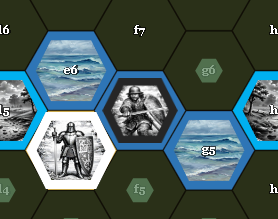
Before the move Enemy infantry stands exactly on the bridge, the knight has selected a move through the bridge
The enemy stands exactly on the bridge — the knight chooses a move through it
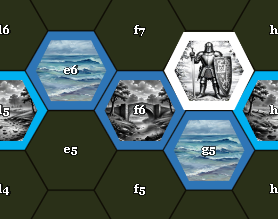
After the move The enemy piece on the bridge is gone, the knight stands on the first hex right after the bridge
The piece on the bridge was killed "en passant", the knight stopped right after the bridge
Pikeman's Zone
An enemy zone of control stops the knight's movement on the first hex where its path intersects the zone
Combat
Strikes any piece within its move range, no rank restrictions
Threat and Protection
No check or checkmate whatsoever. When the knight comes under threat — it's the player's decision whether to move it away or not. If not moved away — the opponent takes it with a regular attack on the next turn, like any other piece
↑ Back to Pieces
Pikeman
Strategic space control without spending a move
×2
Move
Exactly 1 hex in a straight line, in any of 6 directions (no diagonals)
Direct Attack
Strikes any adjacent piece, no rank restrictions — including the knight and the feudal
Zone of Control ("long spear")
A "flower" of 12 hexes: 6 adjacent + 1 further hex in each of the 6 straight directions. Acts passively, without spending the pikeman's move. Each pikeman has an independent zone
The pikeman's zone of control in a flower shape of 12 hexes around the piece
The "flower" of control — always visible on the board, even before any move
Effect of the Zone
The zone doesn't kill by itself — it only stops further movement, the same for any type of enemy piece (infantry, archer, pikeman, knight, cavalry). Death only comes from direct combat: a piece that stopped right next to it (ring1) is struck by the pikeman on the next turn; a piece on the far hex (ring2) must first be approached by the pikeman — which gives its owner a full turn to retreat or counterattack
Blind Spots
Diagonal hexes of the second ring (not along the straight axes) — do not enter the zone, entry is free
⚡ vs 🐴 Cavalry
Mutual destruction was removed from the final balance. Interaction details — cavalry card
↑ Back to Pieces
🐴
Light Cavalry
The most maneuverable — a "gallop" or a straight charge through any pieces
×2
Move ("gallop")
Two options to choose from each move: a) L-move — 2 hexes along a straight axis + 1 hex at a 60° angle (12 variants); b) a straight charge with no turn — simply 2 hexes along the same axis (6 variants) — a more cautious alternative when the final unpredictable turn is too risky. In both cases it leaps over any pieces on its path. It can only land on a free hex or a hex with an enemy piece
18 cavalry move options highlighted around the piece like a star - 12 L-shaped and 6 straight
All 18 options at once — 12 L-shaped (gallop) + 6 straight (charge)
River
Leaps over the river, ford, or bridge with no special effect whatsoever — the same as any other piece on its path, identically in both seasons (the only piece for which the season changes nothing at all). Attacking in this way IS allowed — there are no restrictions
Combat
Strikes the piece on the hex it lands on, no rank restrictions. The attacker always survives
⚡ Against a Pikeman
Exactly 2 cases, in this order (the same for both the L-move and the straight charge): 1) landing exactly on the pikeman's hex — a regular attack, this is the only way for cavalry to take a pikeman; 2) otherwise, if an intermediate hex of the path crosses an enemy zone of control — the cavalry stops on the first hex of the zone, not reaching the target. A pikeman only on an intermediate hex (not the landing point) — is simply leapt over
Case 1 — exact landing Cavalry has a legal move landing exactly on the pikeman's hex - the only way to take it
The landing point coincides with the pikeman's hex — it can be taken
Case 2 — stopped in the zone Cavalry stops at the edge of the pikeman's zone of control, not reaching the intended point
An intermediate hex fell inside the zone — cavalry stopped early, never reached the pikeman
↑ Back to Pieces
🏹
Archer
Mines the terrain — the enemy walks into the arrow itself
×2 (different marker colors)
Move
1 hex in any direction, only onto a free hex — moving does not attack
Action per Turn
Move OR shoot — never both at once. This is a separate, independent action instead of a move
Shot (Threat Marker)
Places a marker on any piece or empty hex within radius 2, with line of sight — any piece on a hex exactly between the archer and the target blocks the shot. Cannot be placed on your own pieces. Cannot shoot from a ford
Marker
1 marker per archer at a time, in its own color. Has no effect on your own pieces
🎯 Situation 1: Empty Hex
A mine — waits indefinitely. An enemy piece walks in on its own → dies instantly, with no chance to react
🎯 Situation 2: Occupied Hex
An ultimatum — the opponent has exactly 1 turn to move the piece away from there. Fails to do so in time → the piece dies
Situation 1 — mine Threat marker on an empty hex waits until an enemy walks into it
A marker on an empty hex — waits indefinitely
Situation 2 — ultimatum Threat marker stands on a hex with an enemy piece - it has 1 turn to escape
A marker on a hex with an enemy — it has exactly 1 turn to leave
How Long It Lasts
The marker remains armed indefinitely, until it triggers or the archer itself changes state — with a new shot or by moving
Melee
Any enemy piece that ends up adjacent to the archer destroys it automatically. Shooting point-blank is also not allowed
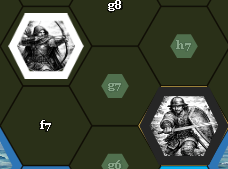
Before Enemy infantry is still 2 hexes from the archer, a move to point-blank range is selected
The enemy is one step away from becoming adjacent to the archer
After The archer disappeared right after the enemy became adjacent
The archer disappeared automatically — no separate attack was needed
↑ Back to Pieces
🛡
Infantryman
Weak alone — deadly in coordination
×6
Move
1 hex in any direction. In the feudal's zone (radius 2 hexes) → 2 hexes in a straight line. The bonus applies starting from the turn after entering the zone. Leaving — the bonus disappears immediately. The river is impassable in summer (without a crossing); in winter it is passable, like ordinary land
Combat Alone
Only against an archer and an infantryman. Does not attack a heavy knight, pikeman, cavalry, or feudal alone
Coordinated Attack
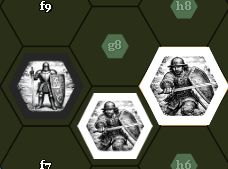
2+ infantrymen simultaneously adjacent to a knight, pikeman, cavalry, OR feudal → the target dies, 1 infantryman dies with it (the rest remain). Triggers after any move
Before One infantryman is already adjacent to the enemy knight, the second makes a move to also become adjacent
One infantryman is already nearby, the second is just moving in from the other side
After The knight and one of the infantrymen disappeared right after the encirclement completed, only the second infantryman remains
The knight and one infantryman disappeared at once — only the second one remains
"In the Zone" Exception
A knight or cavalry stuck in the zone of control of the infantryman's OWN pikeman is finished off even by a single infantryman alone, without coordination
Feudal's Order
If the feudal gives an Order (details) — this infantryman moves 1 hex and attacks any enemy piece, even alone
Promotion
The opponent's castle zone. Promotes to any previously destroyed piece of its own. Not the feudal. The new piece does not move on the same turn
Before An infantryman one move away from the opponent's castle zone, the castle is visible nearby
An infantryman one step away from the opponent's castle zone
After An archer now stands on the same hex instead of the infantryman
The same hex — now there's an archer instead of the infantryman (from previously destroyed pieces)
Castling
An infantryman adjacent to the feudal can swap places with him during the feudal's castling — stays alive, but takes on whatever risk was threatening the feudal
↑ Back to Pieces

Terrain

1 hill and 1 swamp per side, in the gap between the pieces' starting zone and the river. The position is randomly rolled once per game (when a new game is created) from 3 candidate hexes per type/side, independently for White and Black — deliberately NOT mirrored, to give more board variety. A saved game restores that exact rolled position, rather than re-rolling a new one. Placement is automatic, with no separate board-building phase with tiles — a deliberate simplification for this version (a full setup phase would belong to a physical tabletop version). Forest, the third terrain type from the original paper concept, is not implemented yet.

Hill
White's — h4, i3, or k2; Black's — b6, c6, or d6
Effect
An archer standing on a hill places a threat marker at radius 3 instead of the usual 2. This only extends the range for that same single marker — not a new zone and not a second marker at the same time. The rest of the archer's rules (line of sight, melee, marker mechanics) are unchanged
Who Is Affected
Only an archer (own or enemy — the effect is not tied to a side). For all other piece types, a hill is an ordinary passable hex with no effect at all
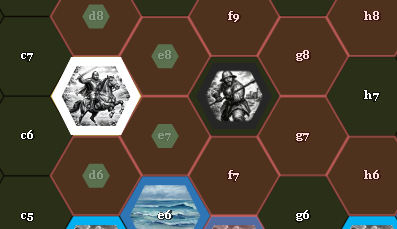
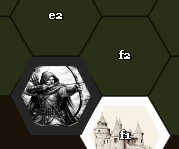
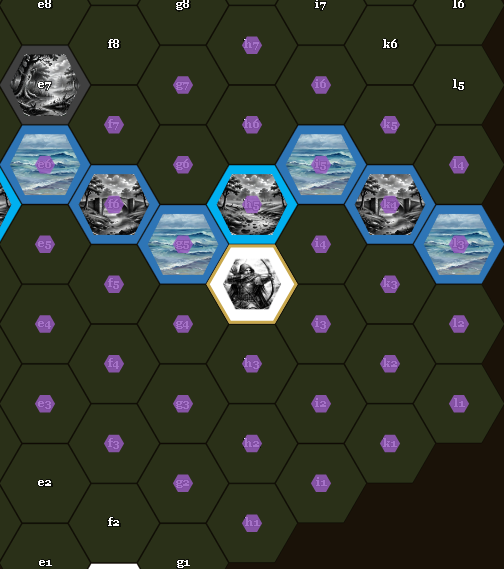
An archer stands on a hill — purple dots show the marker range of radius 3 instead of the usual 2
An archer on a hill — marker range increased to radius 3
🌿
Swamp
White's — c3, e4, or g4; Black's — e7, g7, or i6
Effect
Similar to a ford, but only for enemy pieces. An enemy piece may land on the swamp hex but cannot continue moving further that turn — the same principle already used for a pikeman's zone of control and for a ford. Your own swamp does not hinder you at all — your own pieces know the way through it
Who It Stops
Any enemy piece with a move longer than 1 hex: infantry with the feudal's aura bonus (2 hexes), the heavy knight (a line of any distance), cavalry (mid/far leap). Cavalry leaps over its OWN swamp with no effect whatsoever, like a ford or a bridge
An enemy knight moves in a straight line and stops exactly on an enemy swamp hex, not going any further
An enemy knight stops exactly on the swamp hex — it doesn't go any further that turn

River and Crossings

❄ Season — Summer / Winter
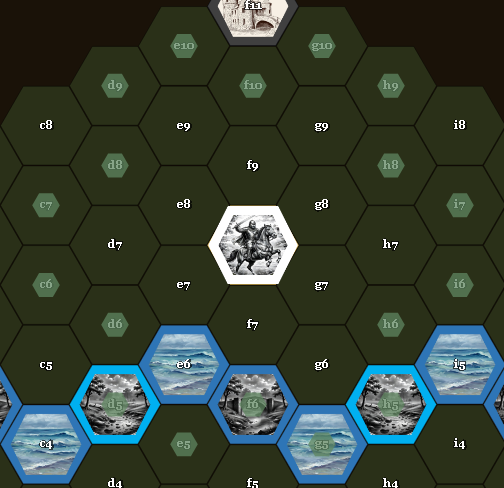
Chosen once on the start screen (a "Summer" / "Winter" radio button in the "Additional Elements" block), fixed for the whole game. Summer (default) — the ordinary river is impassable without a crossing, as described below. Winter — the river freezes SOLID: both ordinary water and fords are rendered with one and the same image (Winter_River.png) and become passable for absolutely all pieces, like ordinary land. In winter, a ford stops existing as a separate terrain type — all its summer-specific features disappear too (the archer's ban on shooting from a ford, infantry's mandatory stop on a ford). The one thing that never depends on the season is the bridge: the knight still never stops on the bridge itself, always on the first hex right after it (a property of the structure itself, not the water beneath it). The 3 bridges (west, center f6, east) are fixed points on the board regardless of season; the 2 former fords (d5, h5) are, in winter, no different from the rest of the frozen river
CrossingInfantry / Pikeman / Feudal / ArcherHeavy KnightCavalry
Bridges ×3Freely passableAlways stops on the first hex right after the bridge (an enemy exactly on the bridge is killed "en passant"). Regardless of seasonLeaps over with no special effect
Fords ×2Freely passableSummer: total blockade, cannot be crossed at all. Winter: passable, like ordinary landLeaps over with no special effect
Ordinary RiverSummer: impassable. Winter: passableSummer: impassable (except via bridge). Winter: passableLeaps over onto a free hex or with an attack — no restrictions, identically in both seasons
Archer and River
An archer may place a marker on a river or ford hex within radius 2, but cannot shoot while standing on a ford itself — this restriction applies only in summer: in winter a ford merges with the ordinary frozen river and stops being a separate terrain type, so the ban disappears along with it

Combat System

⚔ Unchanging Principle

THE ATTACKER ALWAYS SURVIVES

  • The attacking piece never dies together with its target — no exceptions whatsoever (mutual destruction between pikeman and cavalry was removed from the final balance)
  • The only "strikes alone" restriction — belongs to the infantryman (alone it strikes only an archer and an infantryman; everything else only with coordination) and to the "feudal doesn't strike feudal" rule
  • The pikeman, cavalry, heavy knight, and archer strike any piece alone, with no rank restrictions

Piece Strength and Weight Coefficients

There is no formal "rank hierarchy" — almost all pieces strike each other with no restrictions. The weight coefficients below are an internal reference the computer AI uses to evaluate piece value when choosing a move (not a player's "score"):

PieceWeight (AI)Strikes AloneNuance
⚜ Feudal~1000Anyone except the enemy feudalDeath = defeat
⚔ Heavy Knight4.5AnyoneNo special protection — no check or checkmate
🐴 Light Cavalry3.5AnyoneTakes a pikeman only by direct landing
⚡ Pikeman3Anyone+ passive zone of control (12 hexes)
🏹 Archer2Anyone at point-blank range, or from afar with a markerDies automatically from an adjacent piece
🛡 Infantryman1Only an archer and an infantrymanEverything else only in twos or more

Special Combat Rules

Coordinated Infantry Attack
2+ infantrymen simultaneously adjacent to a heavy knight, pikeman, cavalry, OR feudal → the target dies, 1 infantryman dies with it, the rest remain. Checked after any move, regardless of whose move created the encirclement
"Stuck in the Zone" Exception
A knight or cavalry, stopped by the enemy in the zone of control of the infantryman's OWN pikeman, is finished off even by one infantryman alone — without coordination
Pikeman's Zone of Control
A "flower" of 12 hexes (6 adjacent + 1 further hex in each of the 6 straight directions). Doesn't kill by itself — only stops the movement of any enemy piece, the same for all types. A piece that stopped right next to it is struck by the pikeman on the next turn; a piece on the far hex must first be approached — its owner has time to retreat or counterattack
Against a Pikeman — Cavalry
Exactly 2 cases, in this order: landing exactly on the pikeman's hex → a regular attack (the only way to take it); otherwise, if an intermediate hex of the "gallop" crosses an enemy zone of control → the cavalry stops on the first hex of the zone. A pikeman only on an intermediate hex — is simply leapt over
Archer's Threat Marker
A shot is a separate action from a move (never together). An enemy walks onto the marked hex — dies instantly; an enemy already standing there has 1 turn to leave. The marker stays armed until the archer itself changes state
Feudal's Order
Instead of a move, the feudal moves 2 of its own infantry within the aura zone 1 hex each — and each of them attacks any enemy piece this turn, even alone. No limit on uses. Details
Feudal's Castling (once)
The feudal swaps places with an adjacent infantryman — both pieces stay alive. Does not require being under threat. Details

Victory Conditions

All 3 conditions are active simultaneously — the game ends immediately as soon as any one of them occurs:

ConditionDescription
Feudal Destroyed By a regular attack, a coordinated infantry attack, an archer marker, or a "bridge kill" by a knight
"Checkmate" on the Feudal The feudal is under threat and has no safe hex (including castling) — the game ends without direct destruction
Castle Captured Any of your own pieces reaches the central hex of the enemy castle (f1 or f11)

Draw

In the current version — none
Automatic draw detection (by number of moves without active actions) is not currently implemented in the computer version. The game continues until one of the victory conditions above occurs

Disputed Situations — Official Rulings

These rulings take priority over general interpretation.

1. Knight and Ford
In summer, a ford is a total blockade for the heavy knight: it cannot cross it at all, only via a bridge. In winter a ford stops existing as a separate terrain type (merges with the ordinary frozen river) and is passable for the knight just like for all other pieces
2. Knight Without Protection
The heavy knight no longer has either "check" or "checkmate." If it comes under threat — it's the player's decision: move it away or leave it to be struck next turn, like any other piece
3. Archer's Line of Shot
Blocked by any piece (own or enemy) on a hex exactly between the archer and a target at distance 2. There are no terrain obstacles (forest, etc.) in the game
4. Infantry Promotion — Timing
Turn A: enters the castle zone + promotes (end of turn, the new piece does not act yet). Turn B: opponent's turn. Turn A: the new piece moves for the first time
5. Castling — Attacking Piece
The piece that was threatening the feudal stays in its own position after castling — it does not move onto the hex now occupied by the swapped piece
6. Who Dies in a Coordinated Attack
When 2+ infantrymen simultaneously attack a target, the owning player does not yet choose which infantryman dies with it — for now it's always the first one found (a planned interface improvement)

Quick Reference

PieceMoveStrikes AloneKey Mechanic
⚜ Feudal1 hex anywhereAnyone except a feudalAura · Castling · Order
⚔ Knight∞ in a straight line, like a rookAnyoneBridge stops it · No special protection
⚡ Pikeman1 hex straightAnyoneZone of control — 12 hexes
🐴 CavalryGallop 2+1 or charge 2 straightAnyonePikeman — only by direct landing
🏹 Archer1 hexAnyone at point-blank rangeThreat marker · Dies alone in melee
🛡 Infantryman1 hex (2 in the feudal's aura)Only an archer and an infantrymanCoordination 2+ · Promotion
◆ ✦ ◆
🔑 All Key Rules
  • The attacker survives — always, no exceptions
  • 2+ infantrymen adjacent to a knight/pikeman/cavalry/feudal = the target dies, 1 infantryman is sacrificed
  • Cavalry takes a pikeman only by landing exactly on its hex
  • Pikeman's zone — 12 hexes, kills no one by itself, only stops anyone's movement; death comes only from direct combat on the next turn
  • The archer doesn't strike — it mines the terrain. The enemy walks into the arrow itself
  • The feudal gives +1 hex to infantry within radius 2, castles once, and gives "Orders" without limit
  • The knight always stops after a bridge, never crosses a ford, and has no check or checkmate
  • Hill and swamp are implemented (forest is not); both can be toggled off with separate checkboxes on the start screen
  • Summer/Winter season — a toggle on the start screen; in winter the river and ford are passable for everyone
← Classic rules